Rube Goldberg Machine
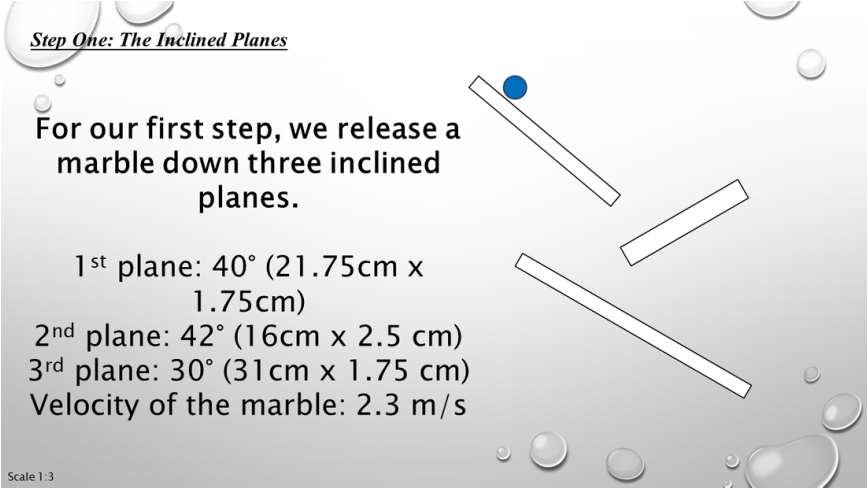
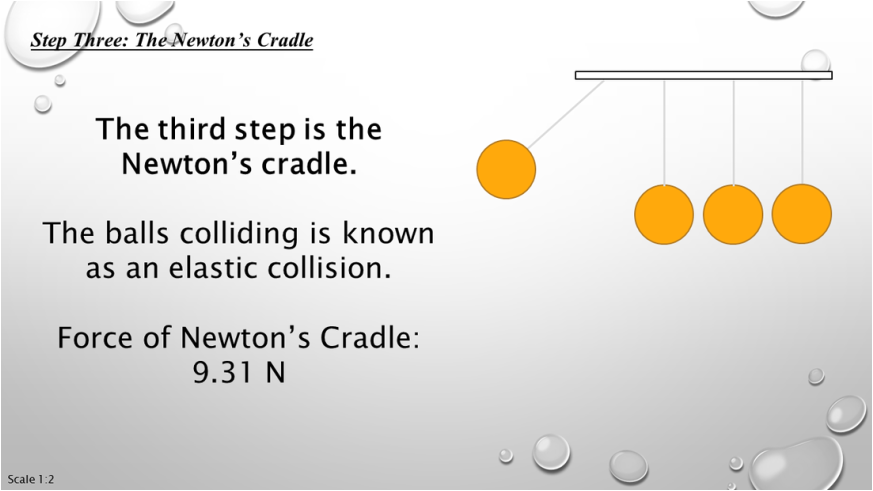
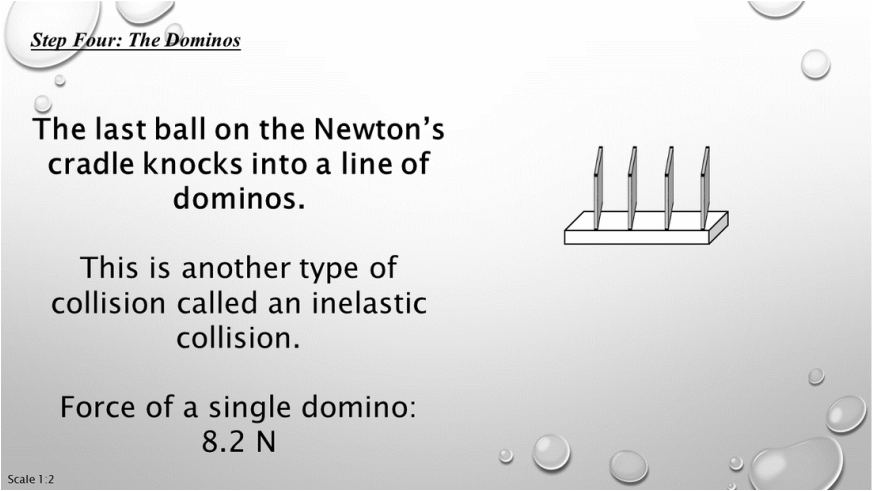
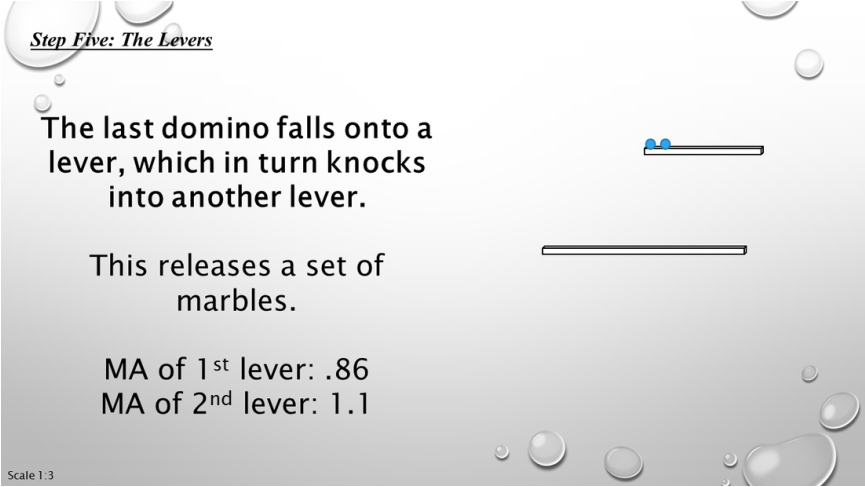
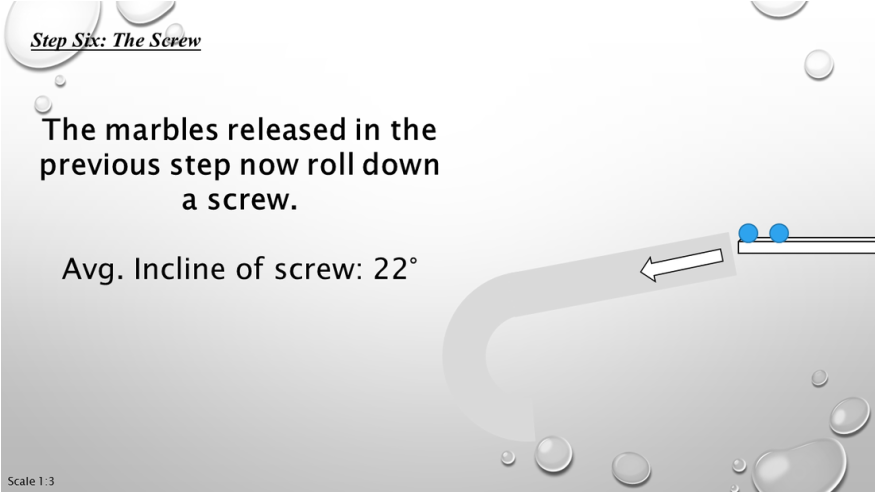
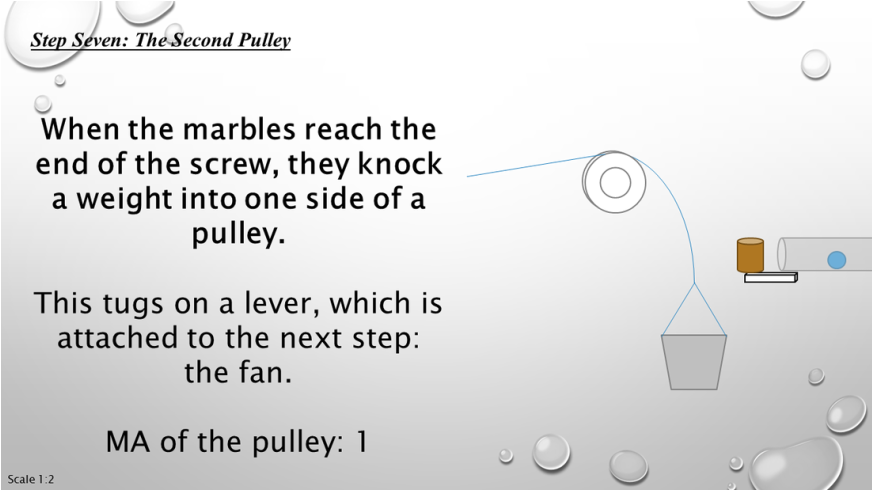
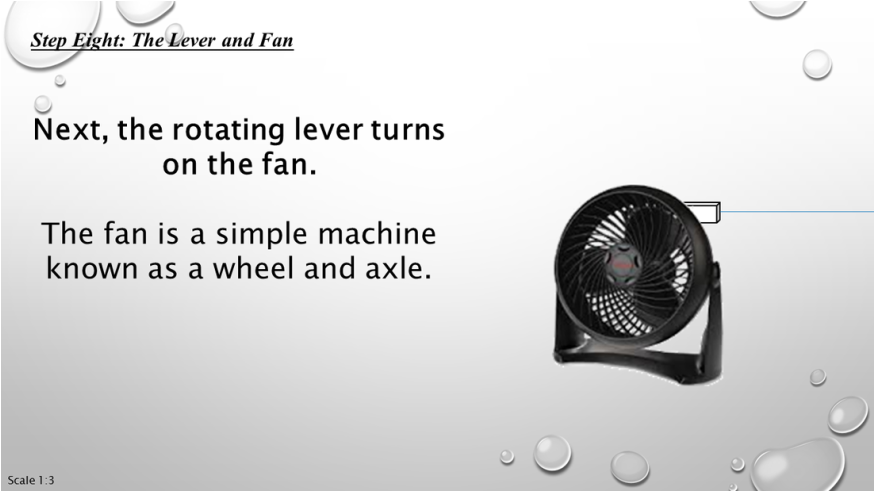
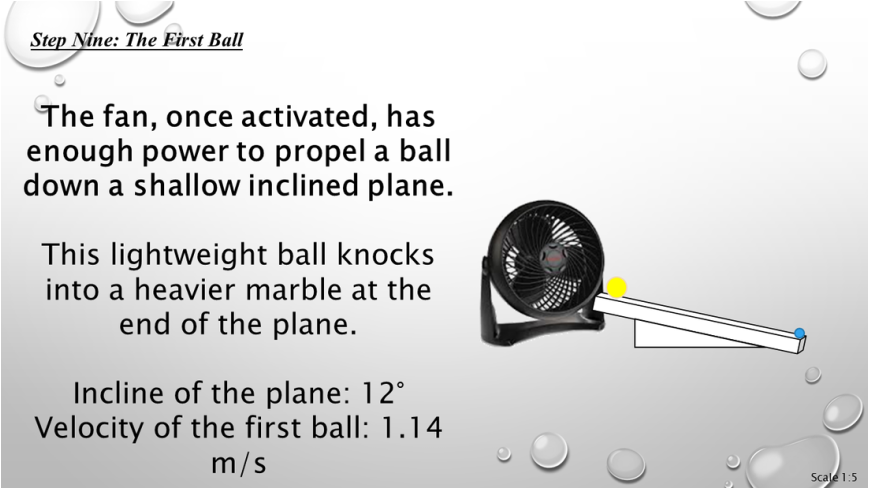
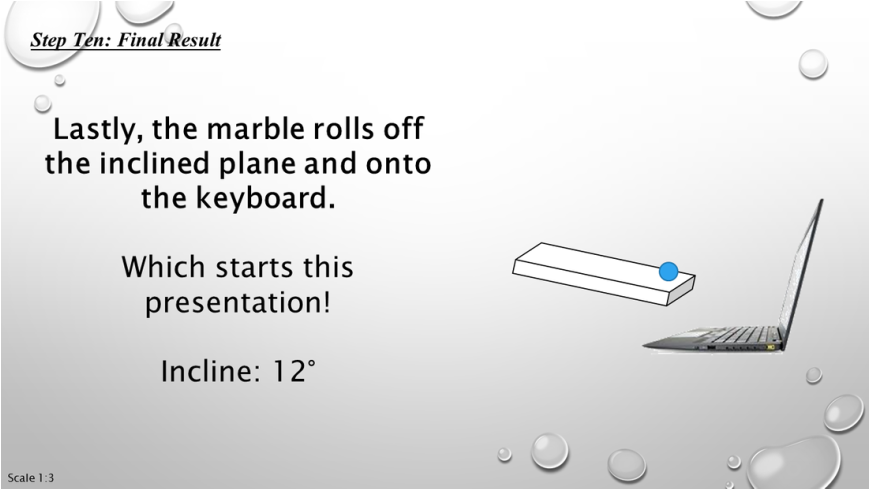
First of all, a Rube Goldberg Machine is a machine that to accomplish a simple task does a whole bunch of crazy long steps to do it. In our machine our job is to do just that. To do so we used 8 inclined planes, 2 levers, 7 levers, and 1 screw. The first step is a set of three inclined planes where a ball rolls into a cup on the bottom, after the ball falls into the cup the pulley yanks the lever from its resting point that lets go of the first ball of the newton's cradle, once the newton's cradle starts the last ball hits the first domino, the dominos topple over each other until the last one falls onto a lever, that lever moves upwards into the second lever shoving balls into the screw, in the screw the ball spick up speed until they reach the end, at the end of the screw a 50g. weight is waiting until it is hit, once hit the weight falls into a cup at the bottom, after it falls in a pulley is triggered which pulls on another lever, that lever pulls on the knob of our fan and turns it on, once the fan is on it pushes a light ball down a ramp, moving down the ramp the light ball smacks a heavier ball at the end that falls onto the space bar of the laptop below starting the power point/presentation.
First of all, a Rube Goldberg Machine is a machine that to accomplish a simple task does a whole bunch of crazy long steps to do it. In our machine our job is to do just that. To do so we used 8 inclined planes, 2 levers, 7 levers, and 1 screw. The first step is a set of three inclined planes where a ball rolls into a cup on the bottom, after the ball falls into the cup the pulley yanks the lever from its resting point that lets go of the first ball of the newton's cradle, once the newton's cradle starts the last ball hits the first domino, the dominos topple over each other until the last one falls onto a lever, that lever moves upwards into the second lever shoving balls into the screw, in the screw the ball spick up speed until they reach the end, at the end of the screw a 50g. weight is waiting until it is hit, once hit the weight falls into a cup at the bottom, after it falls in a pulley is triggered which pulls on another lever, that lever pulls on the knob of our fan and turns it on, once the fan is on it pushes a light ball down a ramp, moving down the ramp the light ball smacks a heavier ball at the end that falls onto the space bar of the laptop below starting the power point/presentation.
Construction and Completion/Reflection
The construction of the Rube Goldberg machine was a daunting task that when you looked at it head on it was very overwhelming. So our group started by brainstorming ideas for machines in a random order and drawing them. After we did that we just pieced the machines into a certain order to create the sketch of our Rube Goldberg machine. Once those were completed we started on the construction. The construction was quite hard because every little thing had to be put right in a certain order and whenever it was not that problem would to another and another. With many minor problems we had three majors, the first began with a system of two levers (as seen in slide 5) that had to be set in the right way that if there was to much force the marbles would fall off and that if there was not enough the marbles would not move at all, so our solution to this problem was by setting the lower lever off balance to give the domino a bigger push but not to much. We had gone through three different levers to get it just right, and Rachel had taken a lot of time shaving off one edge so that it would be just slightly off balance. Eventually it became just right and it worked great! Our next problem was a set of gears that was originally planned to be put into the Rube Goldberg Machine but simply just would not work. There is one gold gear in the background of the video at the bottom of this page. First we tried attaching a wheel to the front however the string would keep pulling off and then we attached it straight to the gear however since the gear was up against the back of the wall the friction was to great to pull and was overall removed. Our last problem was the black fan (as seen in slide 8 and 9/also in the video) where the knob on the back was at a horizontal position and we had to figure out a way to attach a lever to the back of the knob that made it so that it was durable and light enough to pull. Our solution was to duct tape a small light wooden board to the back of the knob, this worked fine besides the fact that the tape would eventually wear and come loose.
I thought that this was a great project to start the year. It was a fun cooperative build and I had a great group to do it with. Once the project was completed it was a nice sense of accomplishment because the machine worked great every time besides when the judges had shown up to critique us (of course) and there were only a couple major problems to fix. Although time management and planning was a key thing we had mostly forgotten to keep track of, it was overall a lot of fun.

Sorry, the power point had animation however I was unable to show that unless it was downloaded to the computer.
